
Then, mark to the right of each point with a permanent marker about 5/8" in from the left. Connect the points to form an off-centered X.

*Label it with the word "top" on the front as it will be very important that you use the correct side!
Next, place the template on the quilt on every seam matching the X with the seams. Trace around the outside of the template.
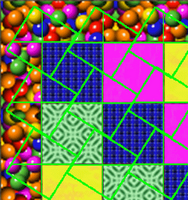
Then using a good pair of scissors, cut out each new "square" that you had traced on the line.

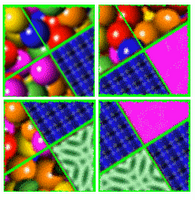
Lay out your squares putting them together like a puzzle to create the pinwheels. (They go in the same place they were in when you cut them out, just turned.)
Sew them together. Add another set of border strips.

Using more template plastic, cut a 2 1/2" square, then cut on the diagonal. Use this triangle to trim off the corners.
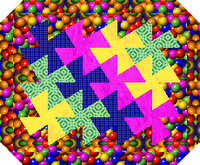
There you go, top completed. You can either birth it and quilt, or quilt and bind. Whichever you choose, but both methods work well.
Well, has anyone started one yet? I hope to see some soon!


2 comments:
Pretty cool, thanks!
Thanks bunches for your tutorial, Kim! Hope to try at least one before too long. :-D
Post a Comment