Monday, November 20, 2006

More instructions...

Cut from your template plastic a 3 1/4" square.
Then, mark to the right of each point with a permanent marker about 5/8" in from the left. Connect the points to form an off-centered X.


*Label it with the word "top" on the front as it will be very important that you use the correct side!

Next, place the template on the quilt on every seam matching the X with the seams. Trace around the outside of the template.

Then using a good pair of scissors, cut out each new "square" that you had traced on the line.

Lay out your squares putting them together like a puzzle to create the pinwheels. (They go in the same place they were in when you cut them out, just turned.)


Sew them together. Add another set of border strips.

Using more template plastic, cut a 2 1/2" square, then cut on the diagonal. Use this triangle to trim off the corners.

There you go, top completed. You can either birth it and quilt, or quilt and bind. Whichever you choose, but both methods work well.

Well, has anyone started one yet? I hope to see some soon!

Sunday, November 19, 2006

Very well then...

You ladies are adorable. How can I resist? ;c)

Okay, we all have limited amounts of time, so I'll just be giving small amounts of instruction at a time. Also, I'm going to assume that everyone knows how to cut, measure and piece, etc. So, I won't always be going into really specific details. However, if you do have a question, please let me know either here or email.

You will need at least 3 fabrics, but you can have as many as 13.
  • You will need something either solid or very busy for the border fabric as it should blend easily with itself when cut and pieced back together. You will need four 2 3/4" x WOF strips per placemat.
  • For the pinwheels, use a variety of value in your choices. You can use only two fabrics if you like (checkerboard style), or you can pick 12 different fabrics. You will need twelve 4 1/2" squares.

Sew your squares together 3 x 4. And add a border around them with your strips. I used a simple diagonal layout, but feel free to go as random as you like. Just make sure that you don't have two matching fabrics side by side or top to bottom. I would also suggest pressing VERY well and using spray starch! You will be cutting using scissors in the next step and it will so much easier if your piece is nice and flat with a bit of stiffness.


Okay, this should keep all busy long enough for me to take a nap. I only had about 4 hours sleep last night and spent nearly that long at church this morning, followed by a shopping trip with hubby and the kids. Needless to say, I'm worn out!

Saturday, November 18, 2006

Tessellated Pinwheel Placemats...

Okay, there have been a few questions on how to make these. Would you like me to post instructions? Perhaps in installments? Let me know and I'll see what I can do. We'll think of it as an early Christmas present from me to you. :c) It really is easy, but you will need some clear template plastic.

Raspberry Tea in Tuscany

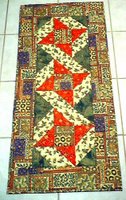
Yippee! I finished the top of my Raspberry Tea in Tuscany quilt! I am ashamed to admit that I started this quilt about three years ago. But being that it is for myself, it kept being put on the back burner while I did quilts for others. Now, who knows how long it will take before it is actually quilted. LOL!

TPP Top Done

Here you are as promised. The top is done, but I won't be quilting it today. I'm going to work on some borders of another quilt. As you can see, the top is finished off by adding another set of border strips and then trimming off the corners.

TPP Part 3

Here you go... I've sewn the pieces back together. This is such a fun pattern. Now, I still have a bit more to do to finish the top and I'll post a pic of that too. It really is amazing... you cut and sew squares together... you cut up the piece into more squares, then sew the new squares back together. This is truly the easiest way I've come across to make pinwheels. My mom loves pinwheels and because I tend to be such a perfectionist, I have yet to make her anything as I don't want to drive myself crazy trying to get a whole bunch of triangle points to match up. Not the case with this pattern! Just regular square seams to match, so no problems with that! Okay, I'm off to finish the top of this one now. I'll be back shortly to post the pic.

Friday, November 17, 2006

TPP Part 2

Here you go... part 2. I cut up that beautiful piecing into 20 pieces! Seems like a shame doesn't it. LOL! If you know where I'm going with this, you know it is a good thing. If you don't, come back soon and you'll see. ;c)

Thursday, November 16, 2006

Trying Twelve Companion

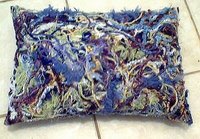
Last year for Christmas, I made the Trying Twelve quilt for my sister (which is really a smaller version of Turning Twenty). This year I decided to make a pillow for her with yarns to match. There are some gorgeous metallics mixed in there, but you can't see them in the pic.

Tuesday, November 14, 2006

TPP Part 1

This is the first part of the Tessellated Pinwheel placemats I'm making for my mom for Christmas. I don't know where this pattern originated from, but I saw a friend do it and had to give it a try. I have been dying to do it ever since, but have way to many UFOs to justify doing something new... until I realized it would be a great Christmas present. LOL!

Countdown to Christmas

This was a mystery project I did several years ago. It is an online mystery... 15 minutes or less a day for 15 days. It was so much fun! To make it even more fun, I had my hubby pick out all the fabrics by himself. I think he did a pretty good job!

Thanksgiving Decor...


I just love the fall season with all it's autumnal colors. I could hardly wait this year to put up my Thanksgiving quilts! This first is the November one of the calendar series. The second one I made up quite a few years ago when I was first learning how to quilt.


Underground Railroad BOM #3

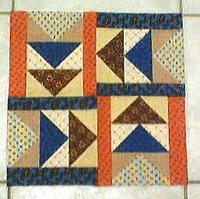
We presented our Flying Geese blocks in class and discussed how to best make the next block. And, oh how excited and blessed I was to win the drawing... the Triangle Square Up ruler by Eleanor Burns. What a great treat!

The discussion centered mostly on food this time around. That the Thanksgiving feasts would probably consist more of beans, corn, roots and berries. How precious it was, the candy we still have today that was made in that time (Necco Wafers). That they started out with a huge breakfast and left the food out to be eaten at lunch and dinner. And in the summer, they would suffer from the "summer complaint", not realizing it was from the left out food in the warm temps. Thank goodness for the refrigerators today!

We also talked about "visitors" and how they would easily stay for a month or more! Can you imagine??? However, unlike today, they were expected to pitch in and help out. And if the everyday person wanted to visit, they needed a calling card. If they showed up early instead of at the correct time, or without a card at all... there was no obligation to see them. Now, that is something that could be useful in my life sometimes! LOL!

Halloween Costumes

Forgive me for the overdue updates. Been sick, but am feeling so much better now. The kids had a wonderful time for Halloween. The kids had me make Eeyore's Rice Creepy Eyeballs. Which are really rice crispy treats rolled into small balls, covered with white icing and topped with a red hot candy and with red food coloring painted veins. They were pretty gross looking, but oh, so yummy! Gentry was Pinocchio and Hailey was Ariel...